How to Assess an Antique Doll's Complete Paint History
Reading the Layers
An antique doll arriving in the studio may have been cleaned, restored multiple times, displayed in various conditions, and handled extensively. Each interaction left traces.
The Examination Protocol
Step 1: Visual examination — overall impression, color/texture variations, obvious repairs.
Step 2: Magnification (10-30x) — surface texture, layer edges, pigment particle size, surface defects.
Step 3: UV fluorescence — original china paint is dark. Acrylic fluoresces bright blue-white. Oil paint fluoresces warm yellow. Shellac/varnish fluoresces bright orange.
Step 4: Raking light — reveals surface topography, thick applications, scratches, paint losses.
Step 5: Documentation — photograph under normal light, UV, and raking light. Create face map marking original, restoration, losses, and damage.
Common Findings
Multiple restoration layers with different materials and skill levels. Selective cleaning creating uneven aging. Partial repainting creating color mismatches. Cover-up restoration concealing underlying damage.
Decision Making
Preserve original paint in good condition. Remove poor-quality previous restorations (with least aggressive method). Match restoration target to what survives.
Working With Complex Histories
Work from the bottom up: document, remove most recent non-original layer, document again, decide whether revealed layer is original, continue until reaching original or confirmed absence.
Documentation Is Non-Negotiable
Document every stage. Future restorers need to know what was original, what was previous restoration, and what you did.
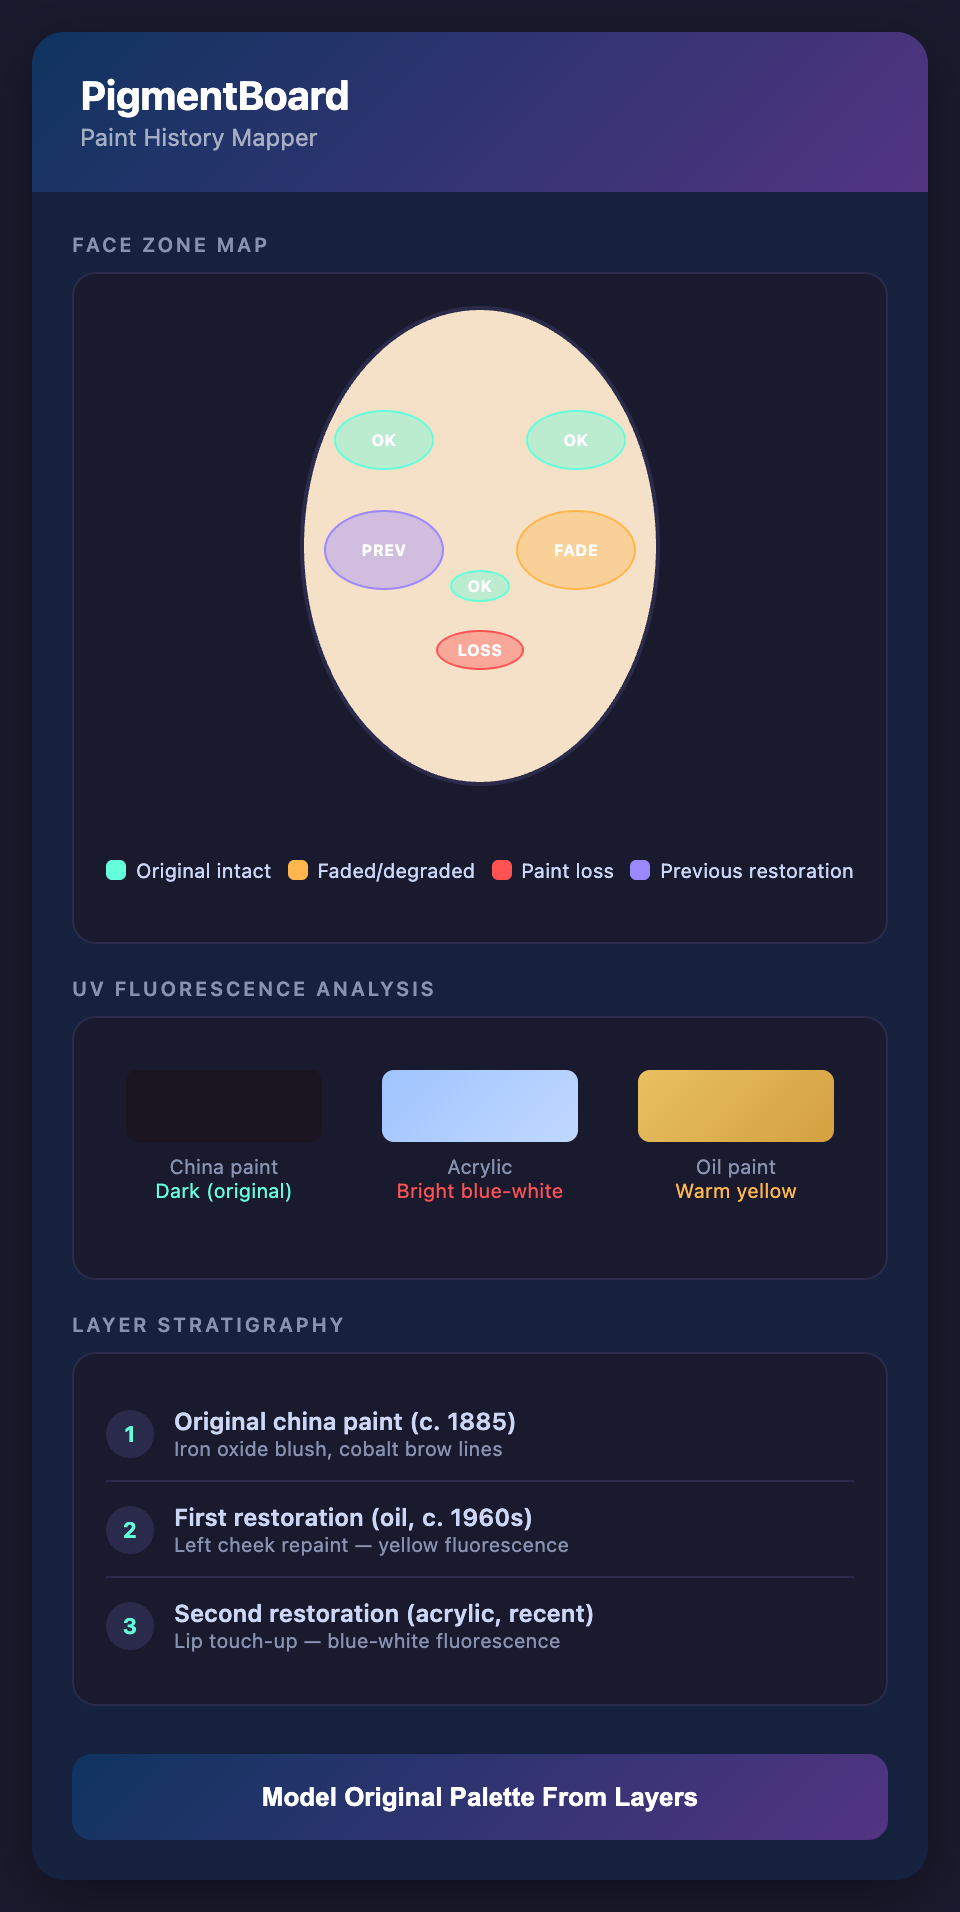
Want to model the original palette even when multiple layers obscure it? Join the PigmentBoard waitlist.