Before-and-After Photography for Doll Restoration Documentation
Why Documentation Matters
Documentation photography serves four purposes:
- Legal protection — Proves the doll's condition before you received it
- Client satisfaction — Before/after comparisons demonstrate the value of your work
- Portfolio building — High-quality documentation images generate new business
- Future reference — If the doll needs future work, your photographs guide the next restorer
Equipment Requirements
Camera: Any DSLR or mirrorless camera. RAW format capability is essential. Smartphone cameras are insufficient for color-critical documentation.
Lens: A macro lens or macro-capable zoom. You need detail shots at 1:1 or greater magnification.
Lighting: D65 daylight LED panels. Two panels at 45-degree angles eliminate shadows and provide even, color-accurate illumination.
Color reference card: X-Rite ColorChecker Classic or equivalent. Include in every photograph for post-processing calibration.
Background: Neutral gray (18% gray card or gray seamless paper). Not white, not black, not colored.
Support: Tripod for consistency. The camera should be in the same position for before and after shots.
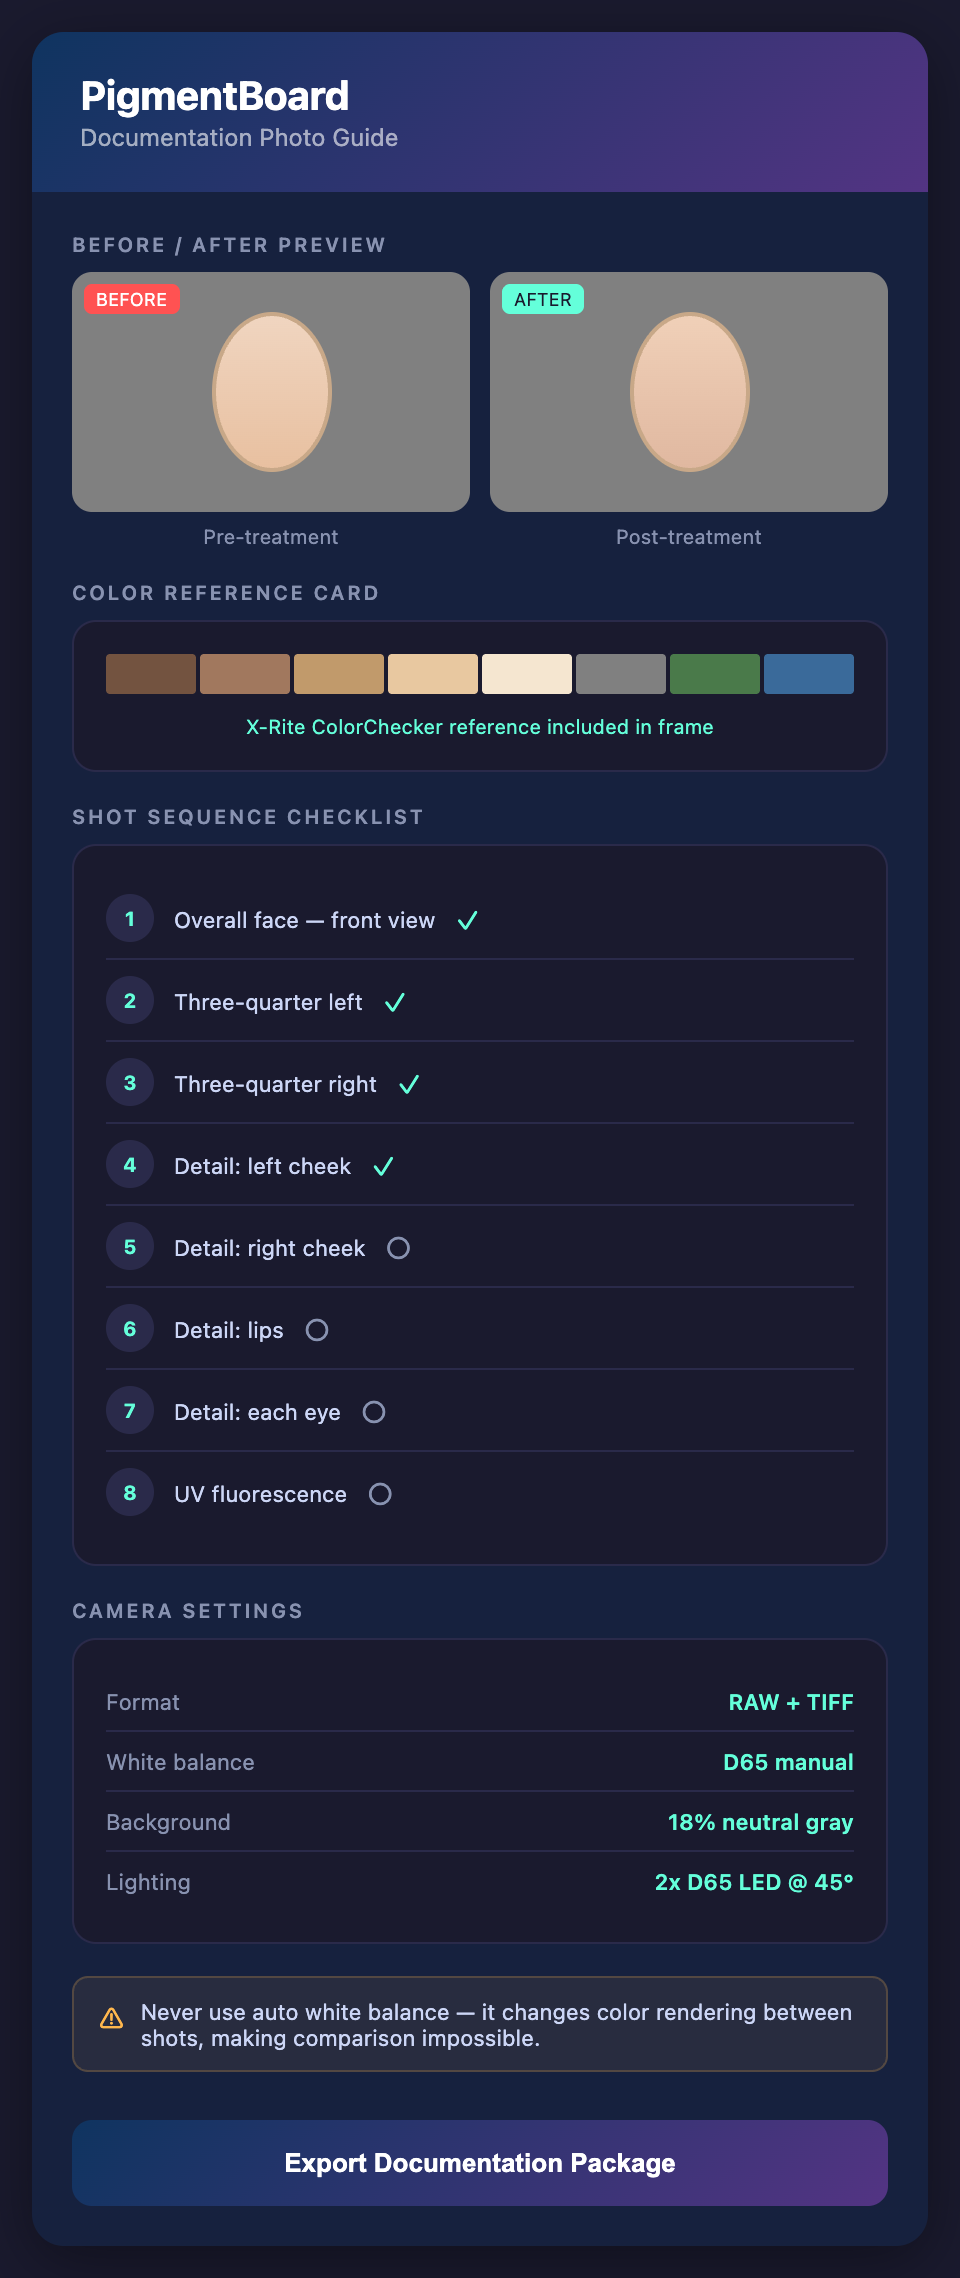
The Documentation Sequence
Before treatment:
- Overall face, front view (color card visible)
- Overall face, three-quarter view from each side
- Detail: left cheek blush
- Detail: right cheek blush
- Detail: lips
- Detail: each eye
- Detail: each eyebrow
- UV fluorescence image (entire face)
- Any specific damage areas at high magnification
After treatment: Repeat the exact same sequence. Same camera position, same lighting, same background, same framing. The only difference should be the treatment itself.
Post-Processing for Color Accuracy
- Open RAW files in your photo editor
- Use the color reference card to create a camera profile for the specific lighting conditions
- Apply the profile to all images from that session
- Do not adjust white balance, saturation, or color beyond the profile correction
- Export as TIFF (for archival) and JPEG (for client delivery)
Common Photography Mistakes
Inconsistent lighting between before and after. Changes in lighting make comparison meaningless.
White background. Makes the doll appear darker and more saturated than reality.
Auto white balance. The camera changes the color rendering between shots, making accurate comparison impossible.
JPEG only. JPEG compression discards color information. Always shoot RAW.
No color reference card. Without a reference, color accuracy cannot be verified or calibrated.
Using Documentation for Color Matching
Good pre-treatment photographs are themselves a color-matching tool:
- When the doll is in the kiln, you can compare fired test tiles to calibrated photographs rather than waiting for the doll to cool
- Detail photographs at high magnification reveal color subtleties invisible to the naked eye
- UV photographs map original vs. restoration areas, guiding your matching strategy
Want to complement your documentation with degradation-modeled color predictions? Join the PigmentBoard waitlist.